I have been experimenting lately with High Dynamic Range photography. This definition from Wikipedia is as good as any:
"In image processing, computer graphics, and photography, high dynamic range imaging (HDRI or just HDR) is a set of techniques that allow a greater dynamic range of luminances between the lightest and darkest areas of an image than standard digital imaging techniques or photographic methods. This wider dynamic range allows HDR images to represent more accurately the wide range of intensity levels found in real scenes ranging from direct sunlight to faint starlight.
The two main sources of HDR imagery are computer renderings and merging of multiple photographs, which in turn are known as low dynamic range (LDR) or standard dynamic range (SDR) images. Tone mapping techniques, which reduce overall contrast to facilitate display of HDR images on devices with lower dynamic range, can be applied to produce images with preserved or exaggerated local contrast for artistic effect."
One of my attempts: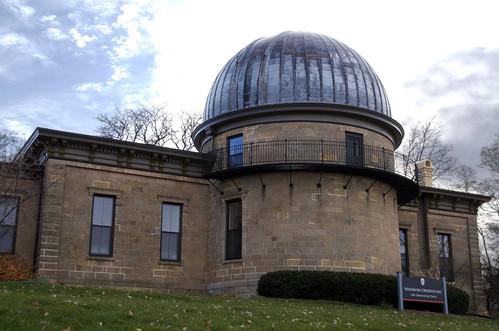
Madison Observatory
I think back to my few hours in the darkroom developing film, and consider this a digital version of dodging and burning. To get the shot above (and let me say that it is pretty likely that I could have gotten closer to this finished image with film and/or filters) I would have exposed the images as correctly as I could, though having the sun high behind the dome would have made that challenging. Then in the darkroom I would have masked the sky portion (dodging it from the light as the print is made) to let it remain less-exposed while allowing the building and the foreground to be more-exposed. Instead, I shot three images at high speed, letting the camera expose correctly (as determined by me), then a stop underexposed and a stop overexposed. These three images were then merged using Photoshop - the digital darkroom - to get the resulting image.
I have nearly no experience at HDR, neither as a technique nor in terms of knowing what subject will look good with this treatment. My experiments so far have given me three-and-a-half successes and three losers. Here is a link to a SLIDE SHOW to show you my successes. On my list to do next is a Madison skyline at night image, taken from somewhere over by Olin-Turville park, maybe along the John Nolen Drive causeway. Stay tuned!
Thursday, November 12, 2009
HDR Experimentation
Subscribe to:
Post Comments (Atom)


This looks like fertile territory for you. I'm interested in following your learning curve. I'm often frustrated by a shot whose color saturation and/or lighting depth isn't as rich and true as what my eye sees. It looks like this technique can attempt to compensate for that. I esp. love the last shot in your slideshow. That's a good sample of where I think this can be put to good use.
ReplyDelete